Film scanning
Alain Oguse learned photographic printing with Claudine and Jean-Pierre Sudre in the late 1960’s, and spent his early career in commercial photography. After retiring, he started to investigate how to bring back the photographic (silver halide) grain in digital scans of film negatives, finding the same sharpness and quality he had with near-point light enlargers in the 1970’s.
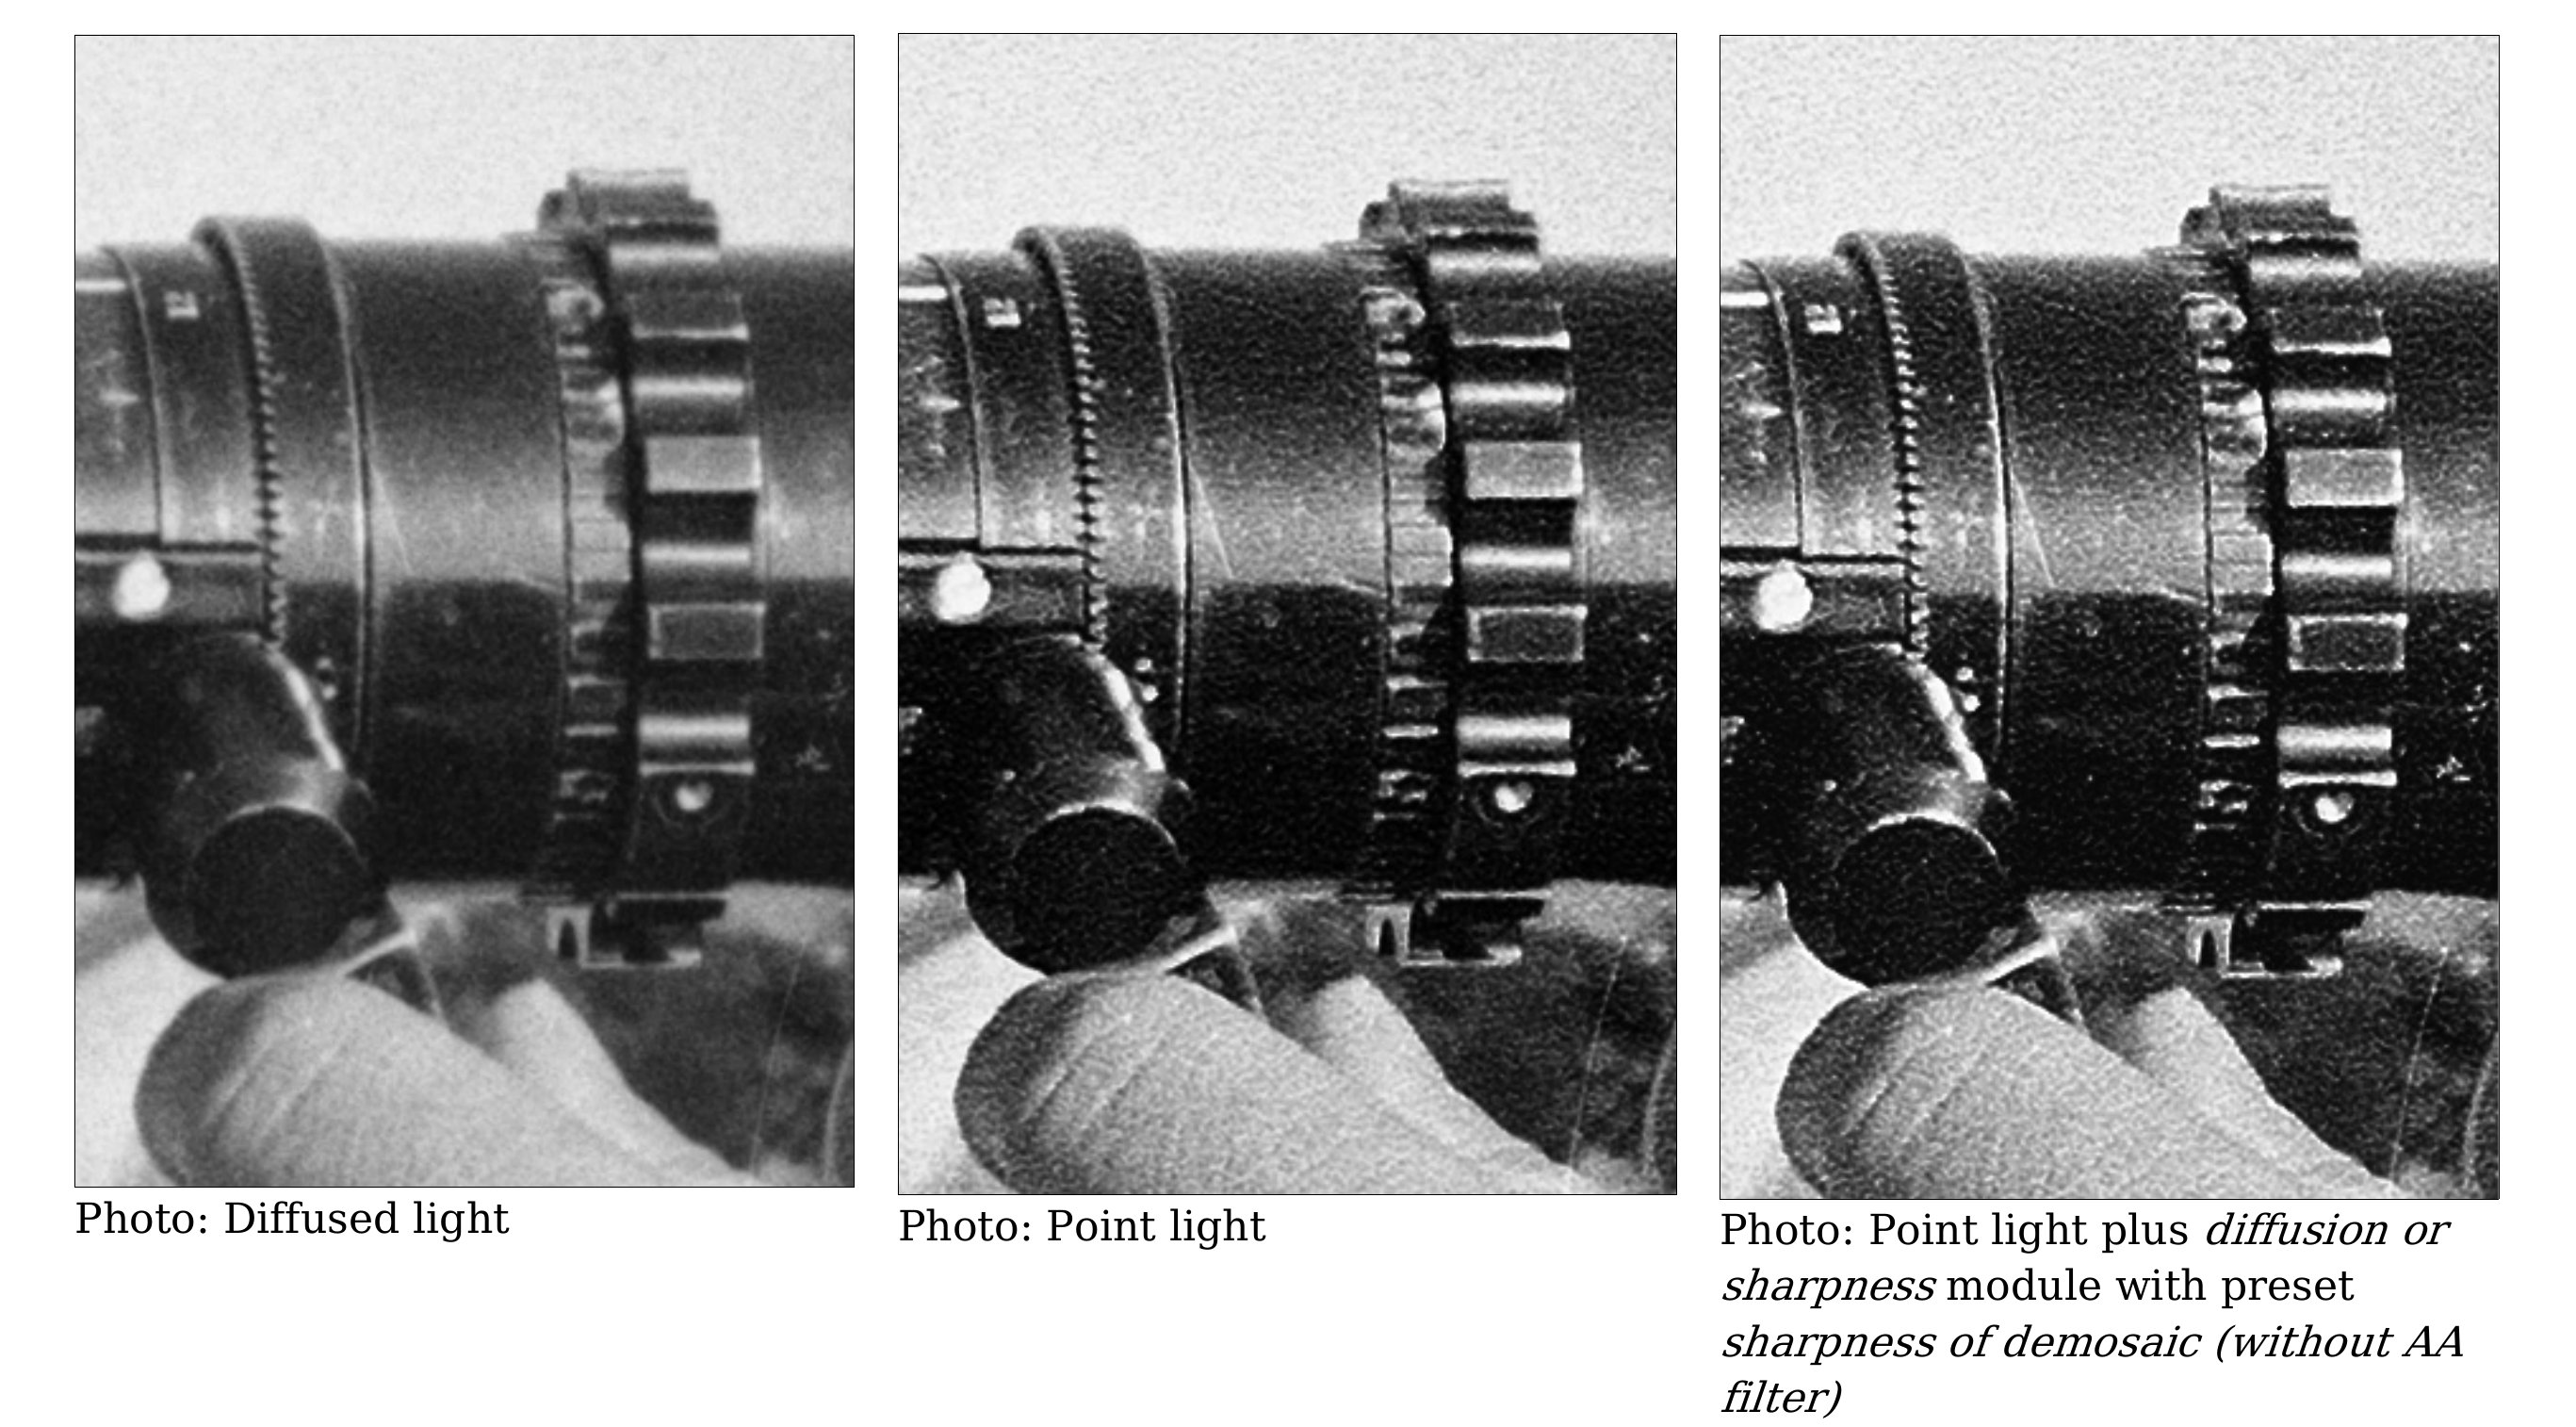
The point light printing technique uses a very tiny source of light that gives a very precise and detailed reproduction of B&W film negatives, as opposed to diffuse lighting. It is very demanding, as its unforgiving sharpness and contrast do not hide scratches and dust on the film surface. Prints done this way would often need manual (painted) corrections on paper, inducing more work and more costs. By the end of the 1970’s, it was usually replaced by diffuse light… better at hiding manipulation mistakes and at maximizing print labs profits.