Alain Oguse erlernte das Fotografiedrucken bei Claudine und Jean-Pierre Sudre in den späten 1960er Jahren und verbrachte seine frühe Karriere in der kommerziellen Fotografie. Nach seiner Pensionierung begann er zu erforschen, wie man das fotografische (Silberhalogenid) Korn in digitalen Scans von Filmnegativen zurückbringt und dieselbe Schärfe und Qualität findet, die er in den 1970er Jahren bei Dunkelkammervergrößerern in Punktlichtqualität hatte.
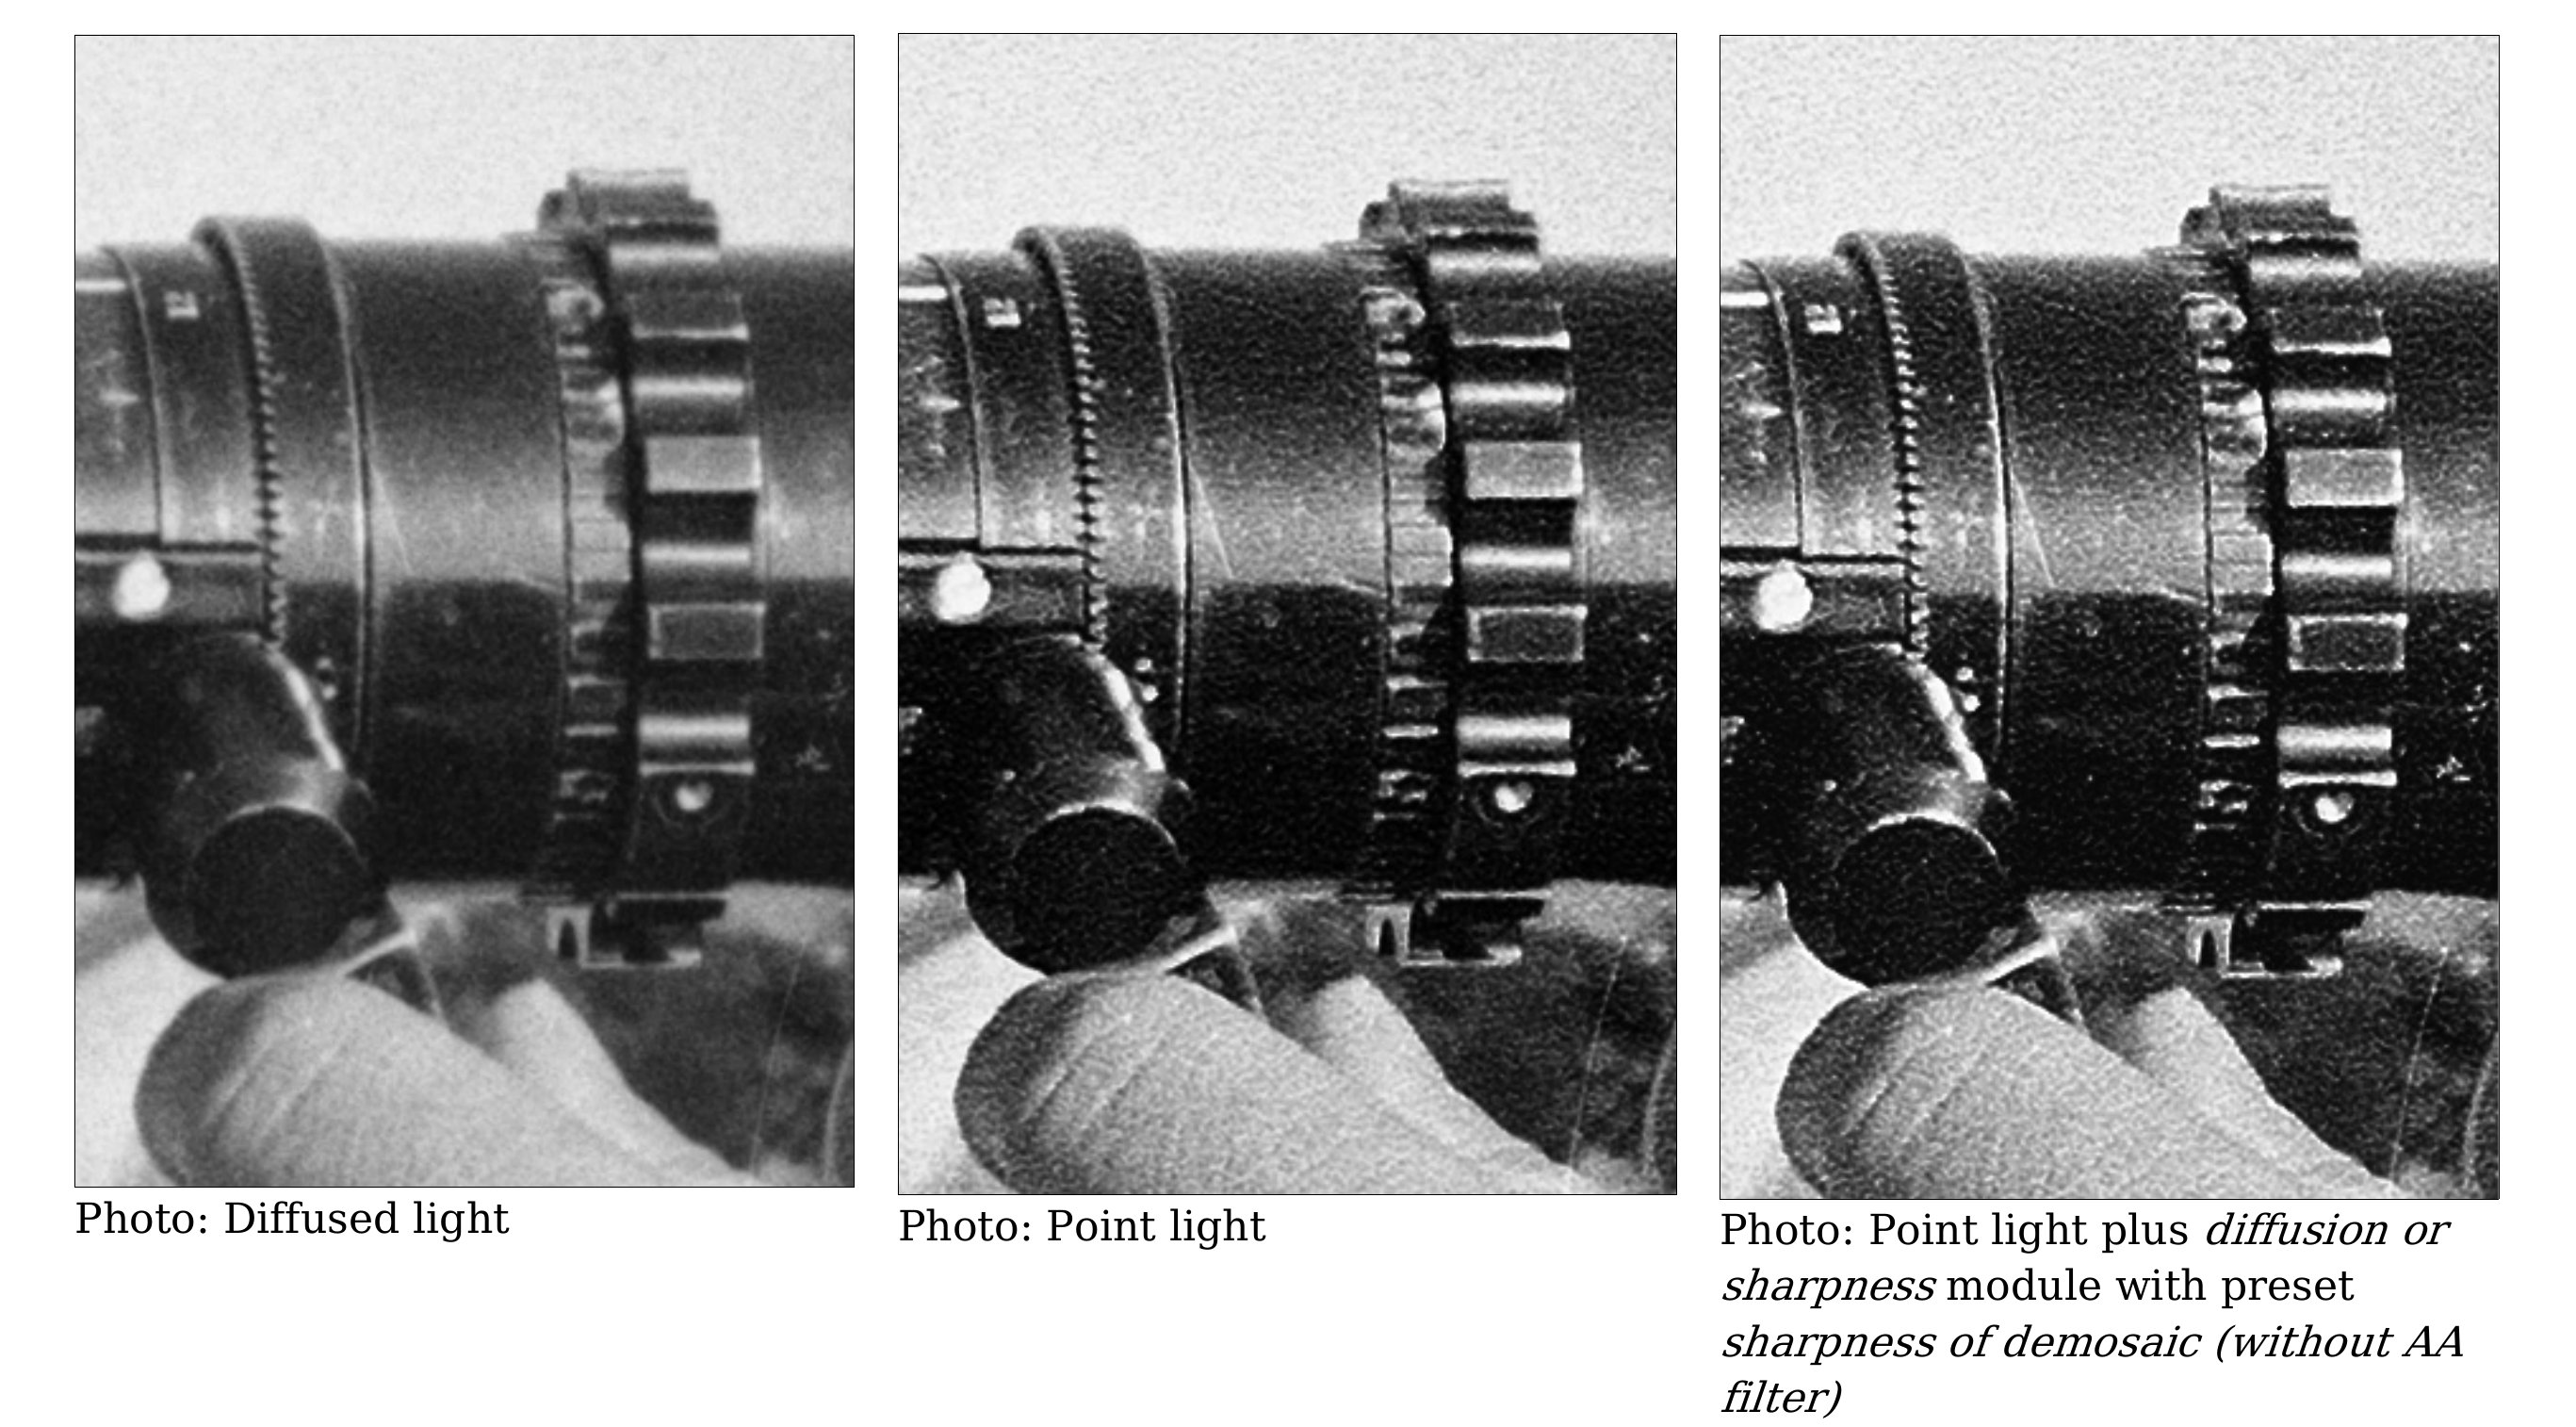
Die Punktlicht-Drucktechnik verwendet eine sehr kleine Lichtquelle, die eine sehr präzise und detaillierte Reproduktion von Schwarzweiß-Filmnegativen liefert, im Gegensatz zur diffusen Beleuchtung. Es ist sehr anspruchsvoll, da seine unverzeihliche Schärfe und Kontrast Kratzer und Staub auf der Filmoberfläche nicht verbergen. Auf diese Weise erstellte Abzüge würden oft manuelle (gemalte) Korrekturen auf Papier erfordern, was mehr Arbeit und Kosten verursachte. Bis Ende der 1970er Jahre wurde sie meist durch diffuses Licht ersetzt… besser geeignet, Manipulationsfehler zu verbergen und den Gewinn von Printlabs zu maximieren.
Aber das Reinigen von Negativen ist kein Problem mehr, wenn sie digitalisiert wurden, und in diesem Punkt teilen Alain und ich dieselben Werte: Digitale Bildgebung sollte die Möglichkeiten erweitern, die Fotografen geboten werden, auf dem analogen Erbe aufbauen, statt sich mit dem zufrieden zu geben, was einfach und schnell ist, während man versucht, die Fotografie neu zu erfinden, als wäre sie digital geboren.
As an early Ansel user, Alain contacted me to get help on tuning the Diffuse or sharpen module to dial up or down the photographic grain in a way that closely reproduces the impact of the enlarger light source quality (point or diffused) on the final print, starting with a DSLR scan. After all, light diffusion is what happens here.1
Aber er baute auch ein komplettes Gerät, um den ursprünglichen Filmscan zu erstellen, und war so freundlich, seinen gesamten Prozess von der Vorbereitung bis zur Nachbearbeitung zu dokumentieren und zu veranschaulichen, ihn ins Englische zu übersetzen und mir zu erlauben, ihn hier zu veröffentlichen. Sie erhalten kostenlos das Beste, was Open Source zu bieten hat:
- 50 Jahre Erfahrung von Alain,
- Beispiele und Ergebnisse aus der realen Welt,
- optische Erklärungen darüber, was vor sich geht,
- vollständige Schemata des Scanapparats im Punktlichtbetrieb,
- physikalisch genaue Module aus der Ansel/Darktable-Pixelpipeline und Presets für Demosaicing, Eingangsfarbprofil und Diffus oder schärfen Module zum Hoch- und Herunterschalten des Korns in der Nachbearbeitung,
- Gedanken zur Arbeit und Verantwortung eines Printlab-Technikers in Bezug auf Erhalt des Erbes und Ausstellungsqualität.
Bitte beachten Sie, dass Alain Französisch spricht und dieses Buch überwiegend mit maschineller Übersetzung übersetzt wurde. Wenn Sie genug Französisch verstehen, möchten Sie vielleicht die Originalversion lesen.
Zusammenfassung der Ansel-Einstellungen
Diese Einstellungen setzen voraus, dass Sie B&W Negative mit einem digitalen Kamera und quasi-monochromatischem grünen Licht scannen.
- Laden Sie das Farbprofil IdentityRGB-elle-V2-g10.icc herunter und legen Sie es in beide Ordner:
- für Linux/Mac:
~./config/ansel/color/in~./config/ansel/color/out
- für Windows:
./AppData/Local/ansel/Color/In./AppData/Local/ansel/Color/Out
- für Linux/Mac:
- Öffnen Sie Ihren Filmscan in Ansel,
- Stellen Sie das Demosaicing Modul ein, um den VNG42 Modus zu nutzen,
- Stellen Sie das Eingangsfarbprofil Modul ein, um
IdentityRGB-elle-V2-g10.iccals Eingabe- und Arbeitsprofil zu nutzen, - Setze das Farbkalibrierungsmodul:
- im CAT Tab, setze die Anpassung auf keine (bypass),
- im B&W Tab, stelle den grünen Kanal auf 1,0 und den blauen/roten Kanal auf 0,0.
- Siehe das Buch für Einstellungen von Diffus oder schärfen.
Diese Einstellungen erlauben es, jegliches Crossover zwischen Kanälen zu vermeiden, sei es durch Demosaicing (das mit kollaborativen Methoden zwischen Kanälen arbeiten kann, bei anderen Methoden als VNG4) oder durch Farbkonvertierungen (bei denen Crossover von Design im Matrizenrechnen eingebaut sind). Auf diese Weise werden jegliche möglichen chromatischen Aberrationen, die mit optischer Brechung verbunden sind und die je nach Lichtwellenlänge variieren, entfernt und wenn Sie unter quasi-monochromatischem grünen Licht scannen, wird die Schärfe Ihres Scans maximal sein, da nur die grünen Photosites des Kamerasensors genutzt werden. In der Praxis entspricht dies dem vollständigen Entfernen der Trichromie aus der Grafikpipeline.
Dies wird natürlich nicht für Farbnegative und Dias funktionieren, die ein breitspektrales Weißlicht und ein trichromatisches Farbmanagement erfordern.
Translated from English by : ChatGPT. In case of conflict, inconsistency or error, the English version shall prevail.
Though it should be mentionned that diffuse or sharpen uses thermal diffusion models (Fourier heat equation ) in wavelets space . This equation can also model particle diffusion, and its fundamental solution can be identified as a convolution with a Gaussian function (aka producing here a very computationnaly-expensive Gaussian blur with the right settings). But since we apply it in wavelets space and we don’t do it at the photon level, I cannot in good faith claim physical accuracy here, with regard to light diffusion. It’s rather physically-inspired generalized diffusion. ↩︎
CHANG, Edward, CHEUNG, Shiufun, et PAN, Davis Y. Color filter array recovery using a threshold-based variable number of gradients. In : Sensors, Cameras, and Applications for Digital Photography. SPIE, 1999. p. 36-43. https://doi.org/10.1117/12.342861 ↩︎
